PAGES

Showing posts with label paper craft. Show all posts

Monday, 2 February 2015

Tessellation Art DIY

A very good morning to you all.  


I am very excited to show you this very easy DIY today.  

A while back I bought a hexagon hole punch as I wanted to make a hexi quilt.  I bought the wrong size, the hexagons were WAY too small for a quilt.  So it languished in a drawer for months - I found it yesterday and POP!  A DIY was born. 

I already had the frame from a recent trip to Ikea. I used the mount inside the frame as my canvas. You can use any used frame you have, and simply cut a thick piece of white card to the correct size if the mount is not white or a bit grubby!


MATERIALS: 

Frame with mount/thick white card
hexagon shaped hole punch
coloured card
glue stick
pencil 
ruler 


So here's how I did it:

- Gathered coloured card in 8 complimentary colours.

- Punched out (approx 100)hexagons.

- I drew a faint pencil line down the centre of my mount - to keep me straight!

- Played around with the arrangement of the colours.  
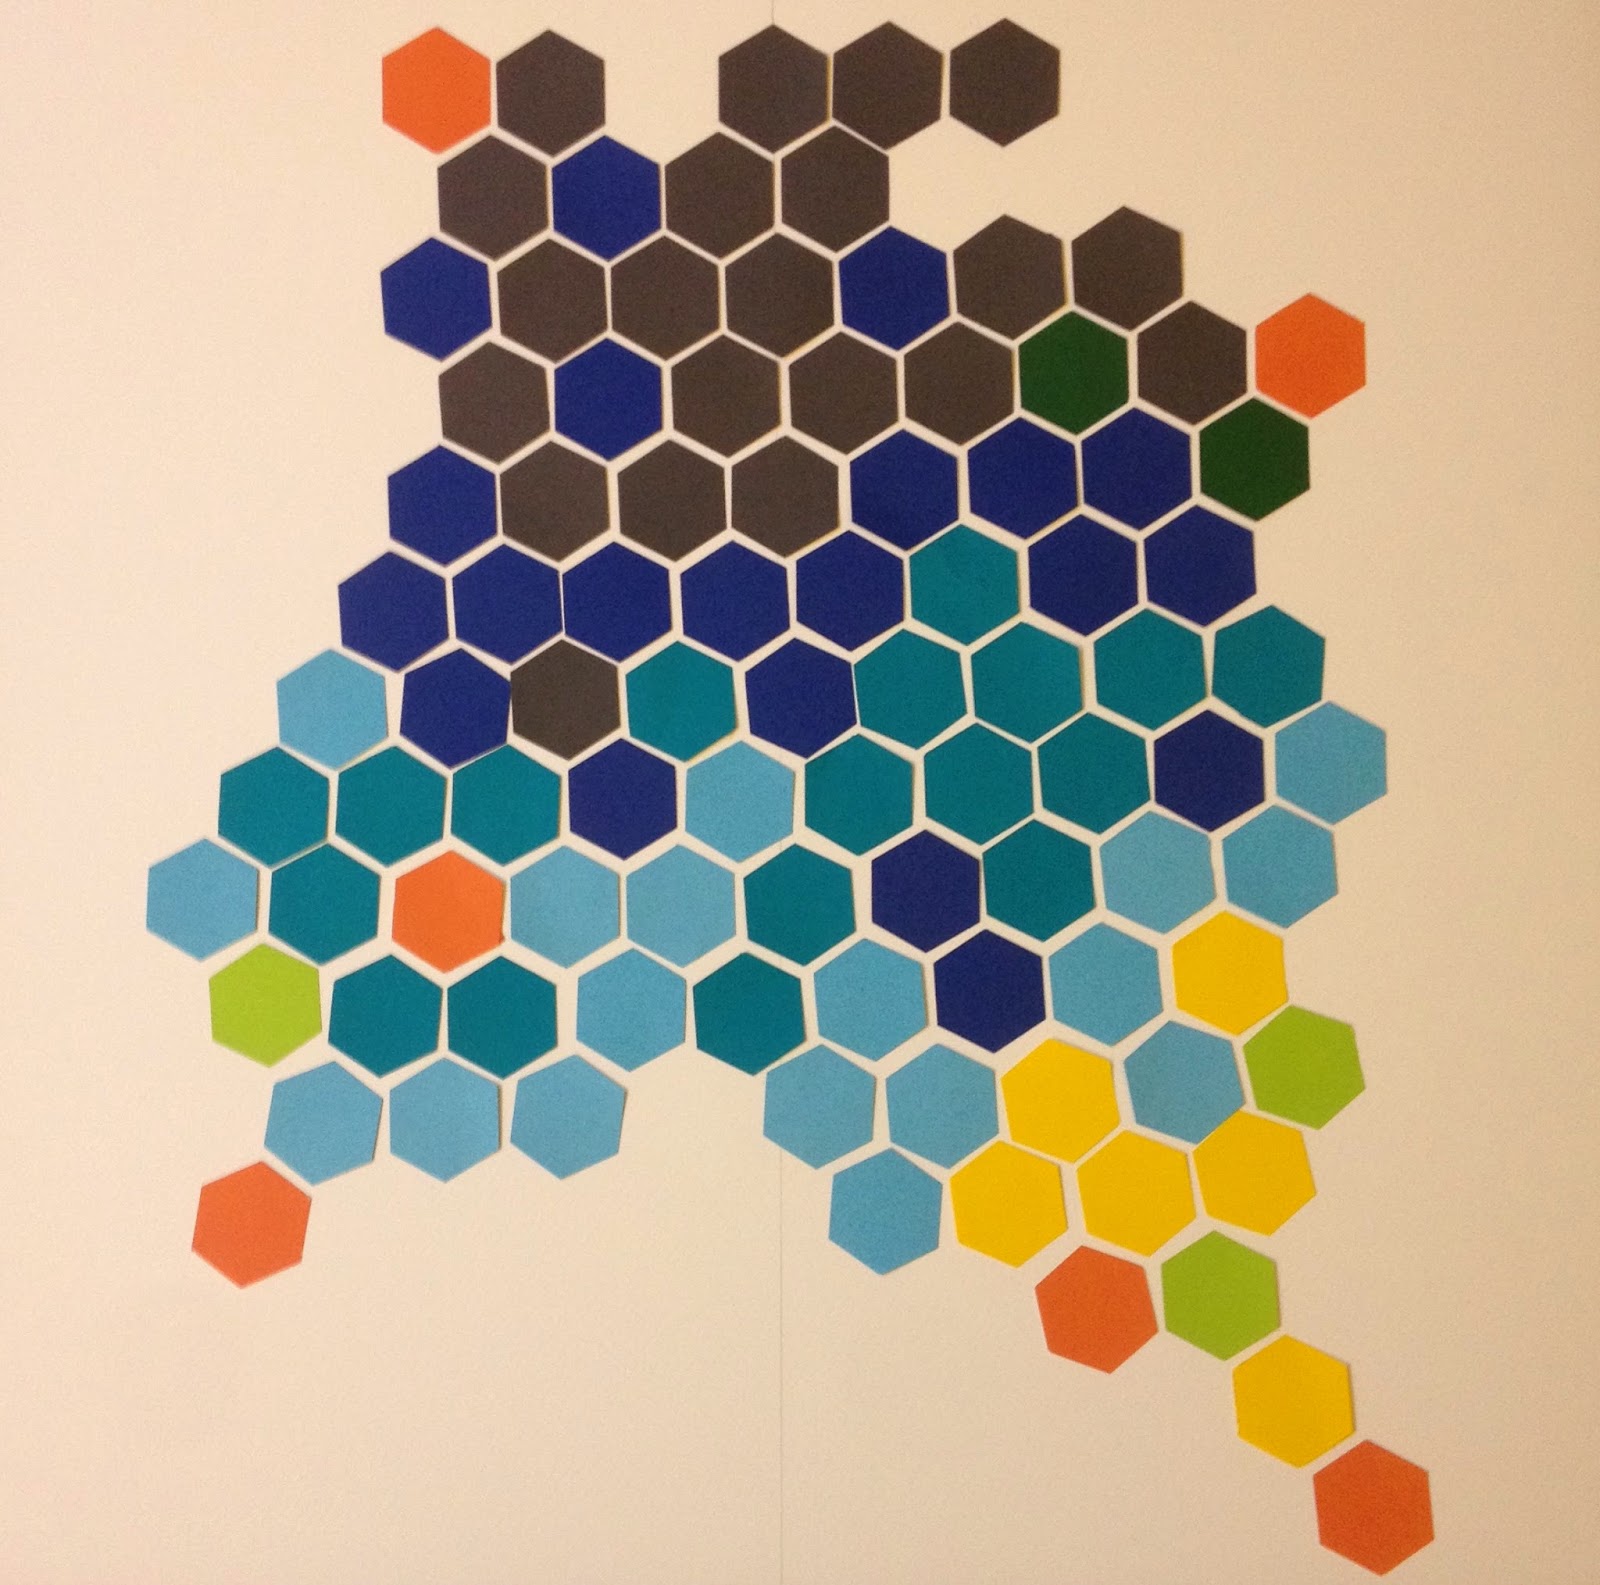


- When I was happy with how it looked, I took a photo using my phone.


- Using a glue stick and the photograph on my phone I carefully glued all the hexagons into place.  Don't forget to rub out the line  as you go.  


Et voila!  A stunning piece of modern art - for free!


I do hope you enjoyed this DIY and are inspired to make something beautiful for your home too.

Till next time....

Claire x

Thursday, 29 January 2015

English/Polish Folk Art DIY

Good afternoon everyone!


I have a little DIY to show off today.  I made my very own version of Wycinanki (Polish paper cutting).  Whilst putting together a Folk Art Pinterest board last week I decided to have a go. 

I have always been fond of Polish Folk Art.  The colours are so vibrant and often Wycinanki is symmetrical; I do like a bit of symmetry.   

If you are not familiar with this wonderfully colourful and intricate form of paper cutting - pop over to my Pinterest board and have a nose if you like.  

I cut out quite a few different shaped flowers and leaves last week, playing around with styles and layering.  

I selected what I thought went well and finally got around to finishing my little work of art today.  Here it is, rather crudely  attached to a glassless frame!  

I am hoping to find a nice frame in a charity shop soon, then I can mount it properly. 


My work is a much simpler version of Wycinanki, I haven't the patience to cut out very intricate designs.  This said I am very happy with it and it looks lovely in my corner of the bedroom.  


Want to have a go?  

This is what you'll need:

- coloured card
- scissors/craft knife (depends on what you feel more comfortable using.  I used scissors.)
- glue

Thats it!  


Thanks for popping by.  See you all soon.

Claire x


Friday, 19 December 2014

A christmassy garland

Hello again my lovelies,

Do you remember earlier in the month I made a few 3 dimensional christmas trees using gold card and an old book?  No? Well you can have a peek here.  

Today I finally got around to putting them to good use.  


 Please excuse the washing drying in the background!  (Its gotta go somewhere!)


Sorry for the slightly blurry photos, I had to enhance the colour as it is so grey and dark here at the moment, it is difficult to get good shots!

I am pleased with the results.  

I hope you are all finding time to be crafty too!

Thank you so much for reading my ramblings and leaving lovely, encouraging comments too!

Claire x

Sunday, 23 November 2014

Easy peasy 3D Christmas cards

Hello lovelies

It is so miserable outside today - pouring with rain, a bit chilly.... what to do?  Get making!


I was inspired to make some Christmas cards by a 'craft at home' article I saw in a supermarket magazine. Using gold card and paper from a very old and scribbled on encyclopaedia, cut out lots of symmetrical tree shapes, glue together and voila you have 3D trees.  I m planning on threading ribbon through them to make a garland.


I then developed the idea further and these were the results!


This time I cut out 3 tree shapes, to make a simpler version.  I am too impatient!  


I used lovely paper from Tiger.  Cheap and gorgeous!


I will add some text to the top of these, but my printer is out of action at the mo.... So I might stamp a message instead, I haven't decided yet. 


Any symmetrical shape will work....

They are very easy to make.  I made some envelopes to match!  


I just used whatever card and envelopes I could find around the home, so they are all a little mismatched but I don't mind that.

Hope you are all warm and dry and enjoying your Sunday too.


Claire x 


Sunday, 9 November 2014

A round up of the past few weeks

WARNING: this is the moany part of the blog - but it get cheerier...I promise.  

Mr J has been able to get home most weekends and has been busy doing lots of DIY.  He is currently in the cellar 'spider proofing' Big G's room!  This involves removing badly made floor to ceiling cupboards and replacing them with a fake wall.  So yet again my house is upside down and an absolute mess.  I'm not moaning but it does mean that I will spend much of the beginning of next week cleaning, rearranging stuff and painting yet more walls.


A few pictures of a small corner of the house that was actually organised (for all of 4 days) , it is currently buried in Big G's boxes, desk, a pile of clothes, you name it, its there.  


My pine cones have opened up and dried out nicely.  Two of my favourite postcards I received this month, some pretty vases purchased in Ikea and a remembrance card for Mr J's granddad who died last year, aged 100.  

I am a bit fed up of painting, but probably not as much as Mr J is; spending every day off doing huge DIY projects!  

So not a lot of sewing or crocheting has been going on this week.  I am however still continuing with my mammoth crochet blanket - one looooooong row at a time!

On a happier note: 
(See, I told you!)

It was middle B's 7th birthday mid week and we celebrated this weekend with pressies and a cake.  I used leftover wallpaper to wrap his pressies.


Not easy to wrap with wallpaper, it doesn't like to fold so you can't get clean crisp edges - but 7 year olds don't notice such minor details! I then used left over wrapping paper to make a sweet garland to hang.  I couldn't find the Happy Birthday garland that we use for every birthday, I'm sure its nestled safely between some fabric in one of my cupboards. 

I whipped up a new one.  Took me about 5 mins to make.  


I had my birthday a couple of weeks ago too, and as usual was completely spoiled by my family - especially by Mr J.

                .  
Please note that my kitchen table is NEVER this sparse!  EVER!  But Mum and I had just finished wallpapering this wall so I decided to take a quick pic.  Birthday flowers from Mr J.

I am a huge fan of Rob Ryan's work...I mean HUGE.  Mr J went overboard (not complaining) in Ryan Town and bought me a lazercut of my favourite piece of Mr Ryan's work.  You can see it on the left of the photo, all framed and ready to be hung.  Swoon.  


When in London a few weeks ago I went to Ikea and stocked up on lots of frames.  I spent an afternoon framing all the new prints we (I say we!  Mr J is the gadgets/appliances man and I am the interiors lady - we stick to our roles!)  have bought for the home.  I now have no finger nails left, but I do have a mini art gallery to admire until I get the time to hang them.  

I am still enjoying being part of the post crossing community.  So nice to receive mail from around the world...some tell you about their culture and lives, others just want to say Hi and practise their English, and there are a few that use it to create beautiful mail art - just to make someone on the other side of the world smile.  I have to admit that I use it as a create outlet. 

 A yellow themed envelope for a postcrosser.

 A wonderfully floral themed package that I received a few weeks ago - for no other reason than I expressed an interested in flowers and airmail stickers from around the world.  

Oh, one more SUPER DUPER CHEERY thing... 

Mr J and I celebrated our 4th (going out together) anniversary yesterday - I couldn't be happier if I tried.  I bagged myself an amazingly kind, thoughtful and funny man when I honestly thought I'd be a single forever!  

Thanks for stopping by my lovelies.  Have a great week and I'll see you all on Instagram till my next post. 

Claire x


Thursday, 26 June 2014

Fourth of July party decorations


A quick DIY tutorial on how to make some pretty party decorations in case you are having a fourth of July party.  One decoration is deliberate, the other is a freebie bonus!

Here goes:

Get yourself some of these:


And one of these:
My paper trimmer will cut straight and wiggly lines... I chose the wiggly lines.  More fun!


Cut your A4 paper into strips, you'll probably get 10-12 strips from each A4 sheet of paper.


Using your paper trimmer, stamp out your stars equidistance apart (as best you can anyway - mines not perfect - but don't tell anyone).


Then get your double sided tape or glue stick and start to assemble your chain.  The strips represent the strips and the stars, well, the stars!


Position somewhere pretty and keep the star cutouts because you can use them to decorate your party table! 


 Free table confetti!  Not just a pretty face you know!


Happy Forth of July folks
x x x


Thank you for popping by. It is always lovely to hear your comments, they are read and cherished x
Related Posts Plugin for WordPress, Blogger...